

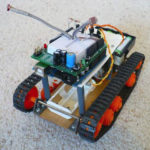
Işık İzleyen Arduino Tank Robotu
6.750,00 TL
Lazerli Güvenlik Alarm Devresi
215,00 TL

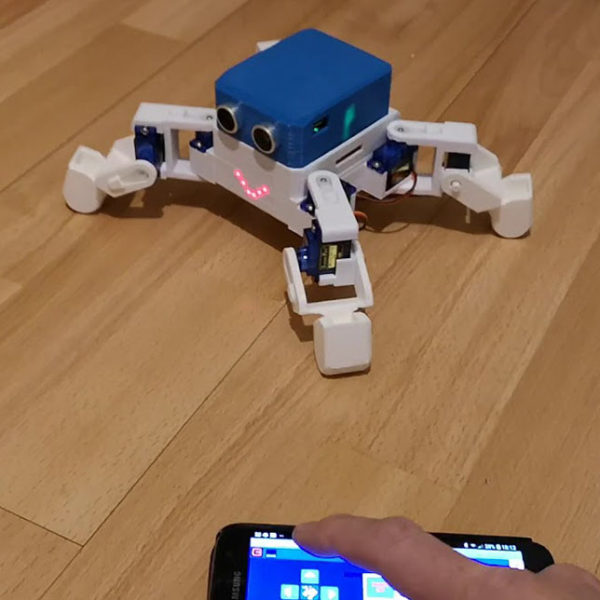
Arduino Kendini Dengeleyen Robot
7.350,00 TL
Kendini dengeleyen robotumuz iki tekerlek üzerinde otonom olarak dengede durmak için sensör tabanlı çalışan bir robottur çok katlı ve dengede durması biraz daha zor olduğundan kodlamada gelişmiş PID algoritma kullanıldı.Kontrol kartı olarak Arduino UNO , motor sürücü için L298N modeli tercih edildi.Bu model sinyallere gayet iyi tepki veriyor.Ayırıca piyasada bulunur ve ucuz.İvme ölçer için MPU6050 kullanıldı.Kendinden 3 eksen GYRO da var.
2 adet stokta
Açıklama

Ek bilgi
| Ürün Markası |
Yapboz |
|---|
Değerlendirmeler (4)
Arduino Kendini Dengeleyen Robot için 4 değerlendirme
Marka hakkında


Kargo Süreci


İlgili ürünler

Arduino LCD Nem ve Sıcaklık
Bu projemizde nem ve sıcaklığı lcd ekranda nasıl gösteririz bundan bahsedeceğiz.Sıcaklık ve nem ölçümü yıllardır kullanılan bir teknoloji biz bunu arduino ile kendimiz programlayarak yapacağız.Evinizde termostat olarak kullanabileceğiniz bir proje olarak düşünebilirsiniz.Öncelikle bu proje sadece evlerde değil otomobillerde buz dolaplarında bilgisayarlarda ve birçok alanda kullanıma uygundur.Projemizde kullanacağımız malzemelerimize bir göz atalım.

Arduino Sumo Robot 3D
3D baskı ile oluşturduğumuz sumo robot şasesine arduino ile programlayıp çalıştırabilirsinz.En temel malzemelerle hazırlanmış olan bu robotu sizde kendiniz evinizde rahatlıkla yapabileceksiniz. Projede kullanılan sumo robot şasesi PLA malzemesi kullanılarak %30 dolulukla basılmıştır.Robot amatör uygulamalar için robot yarışlarına uygun değildir.

Buton İle RGB Led Kontrolü
Buton ile RGB led kontrollü devresinde 3 adet buton bulunmaktadır ve bu butonlar her bir renk ledini ayrı ayrı kontrol eder farklı kombinasyonlar yaparak farklı renk karışımları elde edebilirsiniz.Bu set renk eğitiminde kullanılabilecek niteliktedir.Özellikle anasınıfı öğrencileri için renk eğitimi verilebilir.Ayrıca elektronik devre ve yazılım öğrenmek isteyenler için de güzel bir settir.

Flex Sensörlü Biyonik Robot El
Projemiz flex sensör kontrolü ile çalışmakta, bu sensör bükülüp kırıldığında ara değerler oluşturup analog sinyaller gönderiyor ve bu sinyal kullandığımız arduino tarafından işlenip motorlara iletildiğinde hareket sistemi oluşturulabiliyor.Tüm plastik parçaları 3d yazıcı ile çıkartılmış olup size ister monte ister demonte şekilde gönderebiliriz.Çalış halde teslim ettiğimiz bu proje mekatronik , bilgisayar , makine , eleketrik elektronik gibi birçok daha bölüme uygundur.

Gaz Otomasyon Sistemi Arduino
Evde bir çoğumuz ocağı açık bıraktığımız ve evden çıktığımız olmuştur. Bu proje sayesinde ocağı açık unutsanız bile kablosuz bir şekilde dışarıdan gaz sistemi kesip ocağınızı kapatabilirsiniz.Sistem gaz algıladığında otomatik olarak vanayı kapatacak şekilde programlandı. Eğer ortamda gaz seviyesi yüksekse siz telefondan açmayı deneseniz bile vana açılmayacaktır. Bu bir güvenlik önlemidir. Farklı güvenlik önlemleri programa eklenebilir.

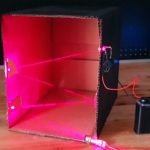
Lazerli Güvenlik Alarm Devresi
Filmlerde gördüğünüz lazer alarm sistemlerinin benzeri bir projedir. Lazerden geçtiğinizde alarm vermektedir. Bu proje her türlü okul seviyesi için uygun basit bir projedir. Lazerin kırmızı yada yeşil olması fark etmez istediğiniz renkteki lazeri satın alabilirsiniz. Ayrıca projeyi ayna kullanarak daha geniş bir alan için tasarlayabilirsiniz. Projede sadece devre ve pil gönderilmektedir. Lazeri ekstra ürünlerimiz bölümünden temin edebilir yada oyuncakçılardan satın alabilirsiniz. Lazerin özelliği önemli değil , kırmızı , yeşil , mavi istediğiniz lazeri kullanabilirsiniz.
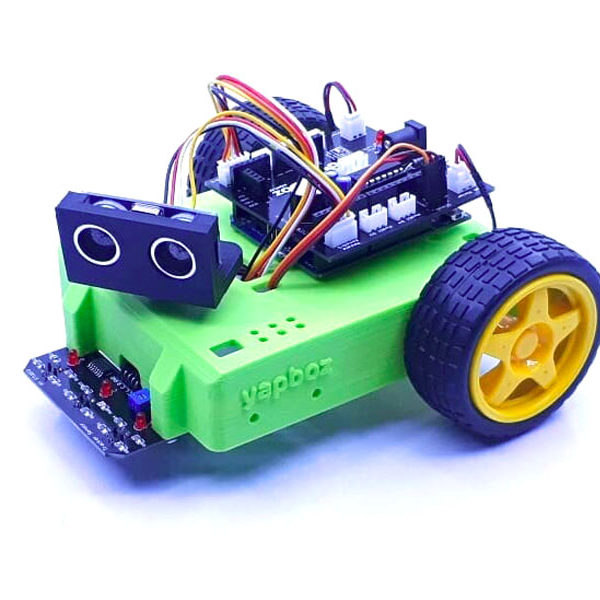
Yapboz Robot Kiti
Arduino tabanlı yapboz robot kiti ürünüdür. Ürün demonte olarak gönderilir. Robot kiti modüler yapısı sayesinde birçok projeye uygundur. Proje 2015 yılında geliştirilmeye başlanmıştır Proje Hocam firmasının geliştirdiği ilk ARGE ürünüdür. Kasası 3D yazıcılarla üretilmektedir. Bu sayede sizin tasarlayacağınız eklentilere tam uyumludur.Üzerinde Arduino UNO mevcuttur ayrıca shield olarak görev yapan yapboz devresi motor sürücü ve sensör yuvası olarak çalışmaktadır.


hande –
Güzel proje olmuş kurulumu geliyor proje
Furkan (doğrulanmış kullanıcı) –
Projenin demonte gelecegi belirtilse daha iyi olurmus. Parcalar eksiksiz sekilde geldi. Robot sasesi 3d printerdan basilmis, hafif kullanisli.
Yağız Sarmanlı (doğrulanmış kullanıcı) –
Malzemeler gayet kaliteli, ürün demonte olarak satılıyor.
ERKAN AKBIYIK –
gayet güzel bir çalışma olmuş ellerinize sağlık kütüphaneleri düzgün yükleyemiyorum kütüphane dosyalarını atarsanız sevinirim.